kirra-docs
Analyse Toolbar
The Analyse toolbar groups the controls for blast analytics, vibration prediction, monitor management, and timing analysis. It is one of the floating toolbars on the right side of the Kirra workspace.
Toolbar Overview
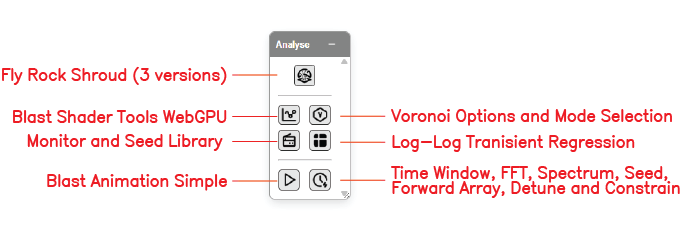 The Analyse toolbar with all eight controls labelled.
The Analyse toolbar contains the following controls:
| Control | Type | Purpose |
|---|---|---|
| Fly Rock Shroud (3 versions) | Dialog | Generate a 3D flyrock shroud using Richards & Moore, Lundborg, or McKenzie |
| Blast Shader Tools WebGPU | Dialog | Open the GPU shader analytics suite — 11 PPV / damage / pressure / powder-factor models |
| Voronoi Options and Mode Selection | Dialog | Configure per-cell Voronoi PPV (Modes A / B / C / E / F), monitors, site-law constants, Love-wave settings |
| Monitor and Seed Library | Dialog | Bulk export / import of monitors and seed traces — CSV + ZIP bundles |
| Log-Log Transient Regression | Dialog | Fit site-law constants (K, B) from measured PPV vs scaled-distance pairs |
| Blast Animation Simple | Dialog | Time-stepped animation of the firing sequence |
| Time Window, FFT, Spectrum, Seed, Forward Array, Detune and Constrain | Dialog | Open the Time Window analysis dialog (seven tabs) |
Fly Rock Shroud (3 versions)
Generates a 3D flyrock shroud — the predicted maximum throw envelope — for the loaded blast pattern.
Available models
| Model | Best for |
|---|---|
| Richards & Moore | Empirical face burst, cratering, and stem eject (2004) |
| Lundborg | Diameter-based conservative upper-bound (1975/1981) |
| McKenzie | SDoB-based range and velocity prediction (2009/2022) |
How to use
- Click the Fly Rock Shroud button on the Analyse toolbar
- Select the model variant
- Configure parameters (charge mass, SDoB, face angle as required by the chosen model)
- Click Generate to produce the 3D shroud overlay on the canvas
See Flyrock Modelling for the full parameter reference and per-model formulas.
Blast Shader Tools WebGPU
Opens the Blast Analysis Shader — the GPU shader suite for PPV, Heelan, Blair, damage, pressure, and powder-factor models.
How to use
- Click the Blast Shader Tools WebGPU button on the Analyse toolbar
- Pick a model (11 available — see Analytics Overview)
- Choose Render On: a loaded surface, or Generate Analysis Plane
- Pick Blast Pattern to analyse
- Adjust model parameters
- Click Apply Analysis to render the overlay
See PPV & Vibration Models for the full model reference.
Voronoi Options and Mode Selection
Opens the Voronoi Options dialog — the per-cell, receptor-aware PPV system. Configure monitors, site-law constants, Love-wave parameters, and pick between Modes A / B / C / E / F.
Available modes
| Mode | Output |
|---|---|
| A — PPV Max | Peak PPV at the cell centroid from the whole pattern |
| B — Dominant Hole | Each hole’s impact at the binding monitor |
| C — Compliance | Worst per-monitor ratio (thisHolePPV / monitorTarget) |
| E — Full Forward Array (PVS) | Per-hole receptor-aware PVS using full L/T/V synthesis (v1.0.230) |
| F — Probability of Exceedance | Per-cell P(V > V_β) per Blair 2011 (v1.0.230) |
See PPV Voronoi Modes for the full reference.
Monitor and Seed Library
Bulk export / import dialog for Voronoi monitors and their attached seed traces.
Capabilities (v1.0.230)
- Tabbed dialog with separate Monitors and Seeds tabs
- Per-row checkboxes for selective export
- Clear DB buttons per store
- Export / Export Selected / Import for both stores
- Monitor export prompts “Include linked seeds?” — yes ships a ZIP bundle (
monitors.csv+manifest.json+seeds/*.bin) - Import auto-detects CSV vs ZIP
How to use
- Click the Monitor and Seed Library button on the Analyse toolbar
- Pick the tab (Monitors or Seeds)
- Tick rows to act on, or use the bulk select
- Click Export Selected, Export (all), or Import
- When prompted, choose whether to bundle the linked seeds in the monitor export
Log-Log Transient Regression
Opens the site-law fitter — input measured PPV vs scaled-distance pairs and fit the constants K and B for the standard site law PPV = K · (D/√W)^(-B).
How to use [VERIFY: full dialog walkthrough — screenshot needed]
- Click the Log-Log Transient Regression button on the Analyse toolbar
- Paste or load measured pairs (distance, charge, PPV)
- Read the fitted K, B, and the regression R²
- Apply the fit to a monitor or save it as a site-law profile
[SCREENSHOT NEEDED: Log-Log Regression dialog]
Blast Animation Simple
Time-stepped animation of the firing sequence — plays the holes back in firing order at a chosen speed.
How to use [VERIFY: animation dialog controls]
- Click the Blast Animation Simple button on the Analyse toolbar
- Set the playback speed
- Click Play — holes light up in firing order
- Use the scrubber to jump to a specific time
[SCREENSHOT NEEDED: Blast Animation Simple dialog]
Time Window, FFT, Spectrum, Seed, Forward Array, Detune and Constrain
Opens the Time Window dialog — Kirra’s master timing-and-vibration analysis dialog. Seven tabs share a single blast-pattern scope:
| Tab | What it shows |
|---|---|
| Time Window | Histogram of detonation events across time |
| IDI | Inter-Detonation Interval — Δt between consecutive events |
| Spectrum | FFT of the impulse train — frequency content |
| Synthesis | Seed wavelet + reconstructed monitor trace |
| Forward Array | Three-component (L / T / V) wave synthesis at a monitor |
| Detune | Apply a random offset to detonator timings |
| Constrain | Enforce a max-events-per-rolling-window rule |
See Time Window Dialog for the full per-tab reference.
Related topics
- Time Window Dialog — seven-tab timing analysis
- Analytics Overview — shader-model background
- PPV & Vibration Models — site-law and waveform models
- PPV Voronoi Modes — per-cell receptor-aware PPV
- Flyrock Modelling — Richards & Moore, Lundborg, McKenzie
- Interface Tour — workspace overview